Last year, I was fortunate enough to acquire a 1945 South Bend lathe Model 9A. Prior to the 1960’s the history is known, but after the 1960’s this lathe served as a hobbyist lathe, and saw very easy use. The ways were straight and after a bit of clean up, I was turning steal, however the lathe tool post needed an update.

My new toy did have a few minor issues. The 1/4 horse power motor is a bit under powered and presumably has lost some power over the years. Additionally, when the motor is engaged the lubrication ports drip oil onto the work desk.
The primary annoyance was that although it came with a lot of nice tooling and cutting tools, the lathe still secured the tools with an old lamp post style tool holder. I originally learned to use a lathe with a lamp post style tool holder, however recently I used my fathers SB 10L and his Aloris Quick Release Tool holder. This quickly converted me to the quick release style of tool holder, which anyone who has used the lamp post style will understand.
My original idea was to purchase an Aloris tool post to match my fathers SB 10L, as my lathe was installed in his shop. The ability to shared common cutting tools seemed like a nice idea. This idea quickly fell out of favor when I learned the cost of a new Aloris tool holder was about $600. Although a professional machinist might find this cost well worth the money, as a hobbyist this price is a bit steep.
After searching the interwebs and some consultation with my father-in-law, I settled on a ECONOMY AXA-#100 PISTON QUICK CHANGE TOOL POST from HHIP Industrial Products, which set me back about $38 including shipping. This is an Aloris Style AXA quick release tool holder which should fit perfectly on a 9 inch lathe. Another $17 and a tool holder was soon shipped to my house and with a total investment of about $55 I was well within my hobbyist budget.

When the tool post arrived, it was shipped quickly, however the packaging was a bit unsubstantial. The tool post itself feels heavy for its size and appears to be well built and machined.
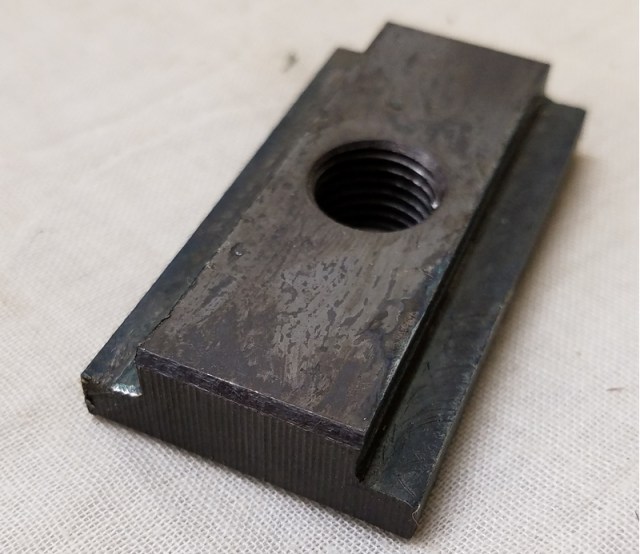
I understood that I would have to perform some fitting in order to use this tool post in order to mount the hardware in the carriage. The nut provided with the new tool holder was very stout nut and roughly twice the volume of the original T-nut from the lamp post tool holder. Every dimension was incorrect, however fortunately the new nut was over-sized.

It was a rather simple task for the mill and i was please with my first milling project. After I milled the new T-nut down to size, the newly fabricated T-nut exhibited no lateral movement and a little bit of bluing will help protect the steal for the long term. I personally left the new nut to provide additional surface area to anchor and stabilize the tool holder.

Once the t-nut was milled down to the correct size, it was a simple matter to mount my new tool holder. Just on a whim, I decided to check my dad’s Aloris Tool holders on my imitation tool post holder and they do not appear to work without modification, which I will not be doing.

